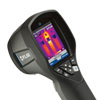
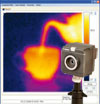
Thermography extends the concept of point radiation thermometry to one-dimensional profiles or two-dimensional pictures of non-contact temperature data.
Thermographic "cameras" find use in the maintenance function in manufacturing plants, especially in the asset-driven capital intensive industries in which temperature is an active concern and diagnostic tool. Typical
targets for infrared inspection include electrical equipment, frictional effects of power transmission equipment, and thermal processing steps in a production line.
2-D Thermographic Analysis
Two-dimensional figures are planes exhibiting only length and width but no height. The two-dimensional plane in question is the view you see with your own eyes. The thermographic equipment in question is an infrared camera comparable in size to a video camera.

Whereas a standard video camera responds to visible light radiating from the object in view, thermographic units responds to the object's infrared radiation. The scene through the camera's viewfinder is presented in false colors designed to convey temperature information.
Specular surfaces, especially metallic ones, reflect infrared radiation. The image of a shiny metal surface viewed through an infrared camera contains thermal information inherent to and radiated by the surface as well as thermal information about the surroundings reflected by the surface. When monitoring the temperature of a transparent object, the optical system may pick up a third source of radiation--that transmitted through from objects on the other side. Modern imagers have emissivity controls that adjust the response of the unit so that it reads accurately.
The compact size of thermographic imagers eliminates the need for tripods and other factors that limit mobility. In fact, in an industrial setting, the technician using the hand-held imager may well be reading temperatures or capturing images while walking around.
Applications of Thermography
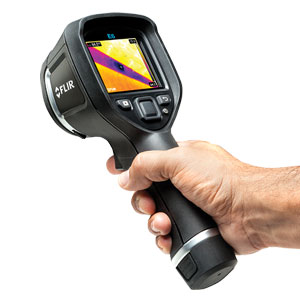
An effective predictive maintenance program implies the need to collect sometimes rather sophisticated data from productive assets located around the plant floor. A plant maintenance technician normally follows a predetermined route and visiting plant assets in a specific sequence. This makes data collection as efficient as possible. At each asset, the technician collects data from discrete sensors while working from a check list so as not to miss a reading. In the case of thermography, the data consists of one or more images of the relevant machine parts.
The technician using the imager in the field must be aware of reflections of irrelevant heat sources that appear to be coming from the object being scanned. Physically moving the imager to the left or right could make a dramatic difference in the apparent temperature of the object. The difference is caused by the reflections of shop floor lighting fixtures, sunlight through windows, and other extraneous sources.
After the thermographic data collection is complete, the technician or the data analyst evaluates the images for evidence of thermal anomalies that indicates a need for either scheduled or immediate repair.
Some thermal imagers simplify work for the user by making it possible to annotate thermal images with voice messages stored digitally with the digital image itself. Some units automate the process of setting the controls to permit the camera to capture the best, most information-rich thermal image as long as the view is in clear focus.
Choose the right infrared camera for your application
 Portable Infrared cameras
Handheld or portable infrared cameras are one of the most popular types of infrared pyrometer. They are very popular in many industries and applications including HVAC, automotive, building inspection, energy audits, plant maintenance, electrical contractors, insulation experts and many more.
 Fixed Mount Infrared cameras
Fixed mount infrared thermometers are commonly used in industrial processes where the thermometer can be mounted in a stationary position.
What is thermography used for?
Electrical Wiring maintenance
Electrical wiring involves many discrete physical connections between cables and various connectors, and between connectors and mounting studs on equipment. The hallmark of a high-quality electrical connection is very low electrical resistance between the items joined by the connection. Continued electrical efficiency depends on this low contact resistance.
Passing a current through an electrical resistor of any sort dissipates some of the electrical power. The dissipated power manifests itself as heat. If the quality of the connection degrades, it becomes, in effect, an energy dissipating device as its electrical resistance increases. With increased resistance, the connector or joint exhibits a phenomenon called ohmic heating. Electricians and maintenance technicians use the thermographic camera to locate these hot spots in electrical panels and wiring. The heated electrical components appear as bright spots on a thermogram of the electrical panel.

Checking 3-phase equipment
>Three-phase electrical equipment connects to the power supply through three wires. The current through each wire of the circuit should be equal in magnitude. However, it is possible to have an unbalance in the phases. In this case, the current in one of the phases differs significantly from the others. Consequently, there exists a temperature difference among the three connections. Thermographic cameras can illustrate this imbalance quite easily and dramatically. Consider, for a moment, the ease with which a thermographer can inspect overhead electrical connections or pole-mounted transformers from a remote, safe place on the ground.
Housing
Thermography also finds use in inspecting the building envelope. It can locate sections of wall that have insufficient insulation. It can also spot differences in temperatures that indicate air leaks around window and door frames. Thermal imaging is useful for inspecting roofs as well.
If a defect in the outermost roof membrane admits rain water that gets trapped between the layers making up the roof, the thermal conductivity of the waterlogged section of roof is greater than that of the surrounding areas. Because the thermal conductivity differs, so does the temperature of the outer roof membrane. An infrared camera can easily detect such roof problems. A thermal scan of the roof and a can of spray paint is all that is needed to identify possible roof defects for a roofing contractor to repair.
Many other applications
Because thermography is a non-contact measurement method, it makes possible the inspection of
mechanical systems and components in real time without shutting down the underlying production line.
Energy constitutes a major cost in most manufacturing plants. Every wasted BTU represents a drain on plant profitability. Thermography lends itself to eliminating the
energy loss related to excessive steam consumption and defective steam traps. If steam is leaking through a steam trap, it heats the downstream condensate return piping. The heated section of piping is clearly visible to an infrared imager.
Heat loss to the surrounding environment is a function of temperature of the inside temperature. The heat loss increases nonlinearly with increased temperature because radiant losses can easily exceed convective and conductive losses at higher temperatures. For example, the refractory block installed inside of a kiln, boiler, or furnace is intended to minimize heat loss to the environment. Thermography can quickly locate any refractory defects. Another application for the technology is a blast furnace, with its massive amount of refractory.
Thermography finds further use in the
inspection of concrete bridge decks and other paved surfaces. The defects in question are voids and delamination in and among the various layers of paving materials. The air or water contained within the interlaminar spaces of the pavement slab affects its overall thermal conductivity. The IR imager can detect these defects.
Painted surfaces become multilayer composites when a bridge or storage tank has been repainted numerous times during its service life. Here, too, the possibility of hidden rust, blistering, cracking, and other delamination defects between adjacent paint layers make objective visual inspection difficult. A technique called transient thermography returns objectivity to the evaluation of a potentially costly repainting project.
 CLOSE
CLOSE


 An effective predictive maintenance program implies the need to collect sometimes rather sophisticated data from productive assets located around the plant floor. A plant maintenance technician normally follows a predetermined route and visiting plant assets in a specific sequence. This makes data collection as efficient as possible. At each asset, the technician collects data from discrete sensors while working from a check list so as not to miss a reading. In the case of thermography, the data consists of one or more images of the relevant machine parts.
