Accelerometer
Introduction to accelerometers
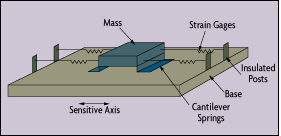
An accelerometer is a device that measures the vibration, or acceleration of motion of a structure. The force caused by vibration or a change
in motion (acceleration) causes the mass to "squeeze" the piezoelectric material which produces an electrical charge that is proportional to
the force exerted upon it. Since the charge is proportional to the force, and the mass is a constant, then the charge is also proportional
to the acceleration.
Learn more about accelerometers
What is a piezoelectric force sensor?
A piezoelectric force sensor is almost as rigid as a comparably proportioned piece of solid steel. This stiffness and
strength allows these sensors to be directly inserted into machines as part of their structure.
Accelerometer Types
There are two types of piezoelectric accelerometers (vibration sensors). The first type is a "high impedance" charge output accelerometer. In this type
of accelerometer the piezoelectric crystal produces an electrical charge which is connected directly to the measurement instruments. The charge output
requires special accommodations and instrumentation most commonly found in research facilities. This type of accelerometer is also used in high
temperature applications (>120C) where low impedance models can not be used.
The second type of accelerometer is a low impedance output accelerometer. A low impedance accelerometer has a charge accelerometer as its
front end but has a tiny built-in micro-circuit and FET transistor that converts that charge into a low impedance voltage that can easily interface
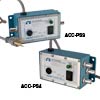
with standard instrumentation. This type of accelerometer is commonly used in industry. An accelerometer power supply like the ACC-PS1, provides the
proper power to the microcircuit 18 to 24 V @ 2 mA constant current and removes the DC bias level, they typically produces a zero based output signal
up to +/- 5V depending upon the mV/g rating of the accelerometer. All OMEGA(R) accelerometers are this low impedance type.
Accelerometer Specifications

Dynamic Range is the +/- maximum amplitude that the accelerometer can measure before distorting or clipping the output signal. Typically
specified in g's.
Frequency Response is determined by the mass, the piezoelectric properties of the crystal, and the resonance frequency of the case.
It is the frequency range where the output of the accelerometer is within a specified deviation, typically +/- 5%. g 1g is the acceleration
due to the earth's gravity which is 32.2 ft/sec2, 386 in/sec2 or 9.8 m/sec2.
Grounding - There are two types of signal grounding in accelerometers. Case Grounded accelerometers have the low side of the signal
connected to their case. As the case is part of the signal path and may be attached to a conductive material, care must be used when using
this type of accelerometer to avoid noise from the ground plain. Ground Isolated accelerometers have the electrical components isolated from
the case and are much less susceptible to ground induced noise.
High Frequency Limit is the frequency where the output exceeds the stated output deviation. It is typically governed by the mechanical
resonance of the accelerometer.
Low Frequency Cut-off is the frequency where the output starts to fall off below the stated accuracy. The output does not "cut-off " but the
sensitivity decreases rapidly with lower frequencies.
Noise - Electronic noise is generated by the amplifying circuit. Noise can be specified either broad band (specified over the a frequency spectrum)
or spectral - designated at specific frequencies. Noise levels are specified in g's, i.e. 0.0025 g 2-25,000 Hz. Noise typically decreases as frequency
increases so noise at low frequencies is more of a problem than at high frequencies.
How to choose an accelerometer?
- What is the vibration amplitude to be monitored?
- What is the frequency range to be monitored?
- What is the temperature range of the installation?
- What is the size and shape of the sample to be monitored?
- Are there electromagnetic fields?
- Is there a high level of electrical noise in the area?
- Is the surface where the accelerometer is to be mounted grounded?
- Is the environment corrosive?
- Does the area require Intrinsically safe or explosion proof instruments?
- Is the area a wet or a wash down area?
Resonance Frequency is the frequency at which the sensor resonates or rings. Frequency measurements want to be well below the resonance frequency of the
accelerometer.
Sensitivity is the output voltage produced by a certain force measured in g's. Accelerometers typically fall into two categories - producing either
10 mV/g or 100 mV/g. The frequency of the AC output voltage will match the frequency of the vibrations. The output level will be proportional to the
amplitude of the vibrations. Low output accelerometers are used to measure high vibrational levels while high output accelerometers are used to measure
low level vibrations.
Temperature Sensitivity is the voltage output per degree of measured temperature. The sensors are temperature compensated to keep the change in
output to within the specified limits for a change in temperature.
Temperature Range is limited by the electronic micro circuit that converts the charge to a low impedance output. Typically the range is -50 to 120C.
Other Considerations when choosing an Accelerometer:
The mass of the accelerometers should be significantly smaller than the mass of the system to be monitored.
The accelerometer dynamic range should be broader than the expected vibration amplitude range of the sample.
The frequency range of the accelerometer should fit the expected frequency range. The Sensitivity of the accelerometer should produce an electrical
output compatible with existing instrumentation. Use a low sensitivity accelerometer to measure high amplitude vibrations and conversely use a
high sensitivity accelerometer to measure low amplitude vibrations.
Choose the right accelerometer
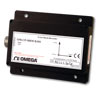
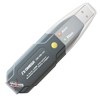 3-Axis USB Acceleration Data Logger
A portable acceleration Data Logger is ideal for assessing the health and diagnosing performance problems of rotating machinery to reveal whether a motor is running efficiently and even indicate whether it may fail in the future.
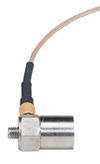
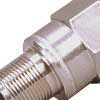
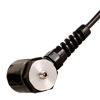 Industrial Grade Accelerometer
Industrial grade accelerometers are the workhorses of industry. The are used on everything from machine tools to paint shakers.
OMEGA has four models to choose from. ACC101 (shown) is a high quality low cost accelerometer for general purpose applications.
ACC 102A is hermetically sealed for harsh environments, has a fixed cable and weighs only 50 grams. The ACC786A, top cable, and
ACC787A, side cable, are hermetically sealed and have detachable cables sealed against the weather.
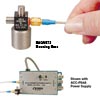 Triaxial Accelerometer
Triaxial accelerometers measure the vibration in three axes X, Y and Z. They have three crystals positioned so that
each one reacts to vibration in a different axis. The output has three signals, each representing the vibration for
one of the three axes. The ACC301 has lightweight titanium construction and 10 mV/g output with a dynamic range
of +/-500 g's over a range of 3 to 10 kHz.
Frequently Asked Questions
How to mount an Accelerometer
The sensor must be mounted directly to the machine surface to correctly measure the vibrations. This can be accomplished by several types of mounts:
- Flat Magnet Mount
- 2-pole Magnet Mount
- Adhesives (Epoxy/Cyanoacrylate)
- Mounting Stud
- Isolating Stud
Magnet Mounts are generally temporary mountings.
Magnetic mounts are used to mount accelerometers to ferromagnetic materials commonly found in machine tools, structures and motors.
They allow the sensor to be easily relocated from site to site for multiple location readings. Two-pole magnetic mounts are used to mount
an accelerometer to a curved ferromagnetic surface.
Adhesives, and threaded studs are considered permanent mountings.
Adhesives such as epoxy or cyanoacrylate have proven to provide satisfactory bonding for most applications. Keep the film as thin as
possible to avoid any unwanted dampening of the vibrations due to the flexibility of the film. To remove an adhesive mounted
accelerometer, use a wrench on the case's wrench flats and twist to break the adhesive bond. DO NOT USE A HAMMER. Striking the
accelerometer will damage it.
Mounting studs are the preferred mounting technique.
They require the structure to be drilled and tapped but provide solid reliable mountings. Be sure to follow the specified torque
settings to avoid damaging the sensor or stripping the threads.
Accelerometer | Related Products
↓ View this page in another language or region ↓
 CLOSE
CLOSE


 Dynamic Range is the +/- maximum amplitude that the accelerometer can measure before distorting or clipping the output signal. Typically
specified in g's.




 Acelerômetros
 Accéléromètres
 Accelerometers
 Accéléromètre
 Beschleunigungsaufnehmer
 Accelerometro
 Accelerometer
 Acelerómetro
 Accelerometers
 Accelerometers
 加速度计
加速度计 Accelerometers
 加速度計
加速度計 가속도계
가속도계 Accelerometers
 Accelerometers
 Accelerometers
 Accelerometers
 Accelerometers